What’s Hangfire?
https://www.hangfire.io/
It is an easy way to perform background processing in .NET and .NET Core applications. No Windows Service or separate process is required.
Reasons to use Hangfire

More information on Hangfire can be found on its official documentation: Hangfire – Background jobs and workers.
Integration with Sitecore
We first need to download the Hangfire NuGet packages into our solution. The required packages are as follows:
Install-Package Hangfire
Install-Package Hangfire.Core
Install-Package Hangfire.SqlServer
Install-Package Hangfire.AspNet
Since we need to initialize the Hangfire in the Sitecore OWIN, you will need to have a reference to the Sitecore.Owin.dll. You can install it via the NuGet package.
Once you have those packages installed, you will need to implement an OWIN middleware that will register the Hangfire with its corresponding configuration. Below is the code of the integration
As you will see above, the implementation of the GetHangfireServers method will configure the connection to the SQL. Note that you may need to change the configuration as per your requirement. You may have more information at Hangfire documentation.
I have implemented a custom dashboard option. This allows you to configure if the user should be authenticated before accessing the dashboard. The code can be found below.
The above code is just checking if the Sitecore context user is authenticated or not. If you are authenticated, then you will be able to access the Hangfire dashboard. You may want to add the logic from the Sitecore Identity authentication.
Update Sitecore configuration files
The first update you need to perform is to add the custom OWIN middleware we just implemented. The configuration file will look as follows:
One important update you need to have is to ignore the path /sitecore/hangfire else Sitecore will interpret it as a friendly URL. You do so by adding the path to the IgnoreUrlPrefixes settings in Sitecore.config. You may want to create your own patch file and add it, which is as follows:
Testing and Validation of the Hangfire Integration
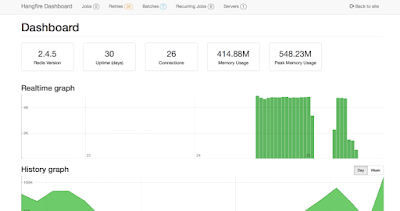
Compile the solution and deploy both code and config files. Once completed, load your Sitecore instance and login into the Sitecore CMS. As soon as you are logged in, you can access the Hangfire Dashboard by navigating to the URL [domain]/sitecore/hangfire.

One quick step you can do is to add a Launchpad button in Sitecore so that it comes much easier to access the dashboard. All you need to do is
- Switch to the core database
- Navigate to the path /sitecore/client/Applications/Launchpad/PageSettings/Buttons. Then choose in which category you want to add the button. In my case, I added it to Tools
- Insert a LaunchPad-Button item
- Add the name, icon etc. Most important one is the field name Link. You can add a full URL or just a relative path. Example, /sitecore/hangfire

Upon clicking on the button, it will open the Hangfire dashboard. You can choose to either open it in a new tab or current window from the LaunchPad-Button item you created in the core database

Comments
Post a Comment